需求條件
最初我們在玩這特效是大約 2019 年時,按照此篇教學文一步步做起來,今天不會特別聊到整個特效的原理,只有如何將該文章所提供的特效程式,整理成我們自己所需要使用的方式。
- 可以簡單地被複製使用
- 未來可以擴充更多控制項目/功能
- 可容易與其他程式/套件結合
在我這的需求,因為希望每個 Slider 輪播都可以應用上,我們目前公司所使用的輪播是 Swiper,希望可與 Swiper 使用相同的方式,只要傳入 Dom、輸入控制項目即可。
由於已經使用了 Swiper 我就不希望還要自己去計算 Index,這樣更能與 Swiper 同步,所以 Index 計算的部分,就直接使用 Function 傳入參數來驅動計算誰是下一張,整體可以讓程式更簡單,只要負責運算特效就好。
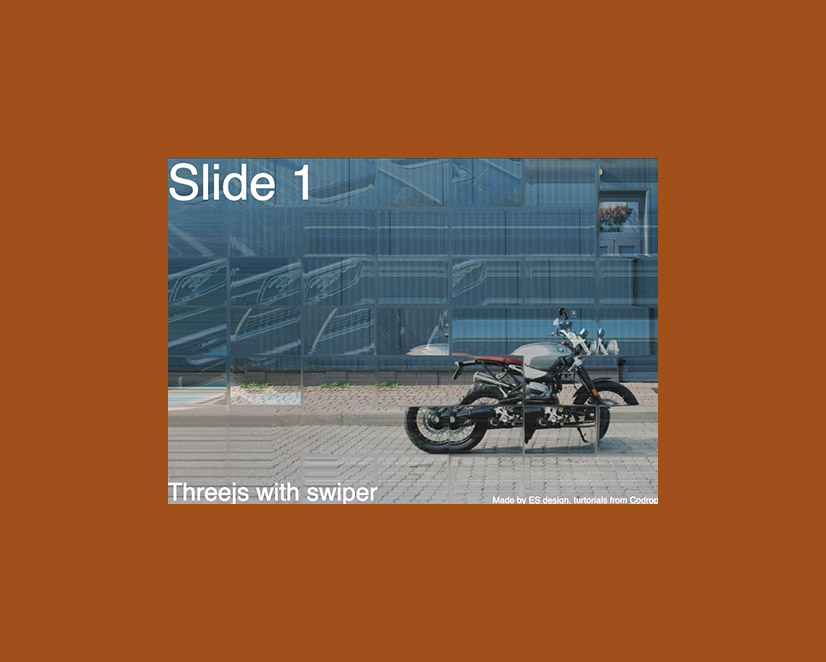
先讓大家看看效果
這次的範例基於懶人原則,直接用目前專案已經寫好的 Typescript 版本來示範,如有需要 Javascript 版本可自行調整,或者來信跟我們要囉。
首先我把 vertext、fragment、dispUrl 這幾個參數特別拉出來放著,方便以後慢慢調整,dispUrl 是變形所需的圖片。
接著把其他基本要應用的參數全域命名。
width: any
height: any
scene: any
sRunning: boolean
renderer: any
camera: any
material: any
uniforms: Object
plane: any
slideTextures: string[] = [];
currentIdx: number
totalImgslength: number
constructor 的部分呢,目前範例僅需要三個數值,DOM元素、圖片陣列、自動播放(測試用),之後自動播放會由 Swiper 來控制。
constructor(
    public DATA: {
        container: HTMLElement,
        images: string[],
        autoplay: boolean
    }
)
接著初始生成數值
// 初始數值
this.totalImgslength = this.DATA.images.length
this.currentIdx = 0
this.uniforms = { value: 1, type: 'f', min: 0.0, max: 3 } // 特效設定
this.width = this.DATA.container.offsetWidth
this.height = this.DATA.container.offsetHeight
this.scene = new THREE.Scene() // 3Dt場景建立

this.renderer = new THREE.WebGLRenderer() // 渲染建立
this.renderer.setPixelRatio(window.devicePixelRatio)
this.renderer.setSize(this.width, this.height)
this.renderer.setClearColor(0x000000, 1)
THREE.Cache.enabled = true

// 攝影機建立
this.camera = new THREE.PerspectiveCamera(70, this.width / this.height, 0.001, 1000)
this.camera.position.set(0, 0, 2)
先來看看我們總共需要哪幾個 Function
- init() 生成時要做的事情
- createPlane() 因為他的特效原理是建立在 3D 板子上面的,所以要建立一個板子
- resize() 當螢幕發生變化時
- next(idx) 我們需要利用 Swiper 來驅動執行下一張圖片
- changeSlide(idx) 為了往後客製化更方便我把更換圖片的 Function 獨立拉出來
- render() 渲染丟進 requestAnimationFrame()
是不是超少? 對! 把其他複雜輪播的邏輯就丟給 Swiper 吧!我只想寫特效而已~接著就開始完善全部功能吧。
init()
生成時我要先讀取圖片,首先我使用了 THREE.loadingManager() 他自帶的讀取功能,我就不需要自己寫 Promise 了(而且好像用人家完整一套的東西比較安全),接著 forEach 把圖片拿出來個別讀取。這邊比較要注意的是,因為讀取圖片是使用 TextureLoader,但為了讓 manager 可以全部共同管理讀取,所以在 new 這個功能時要帶入 manager TextureLoader(manager)。
自動播放只是會另外寫一下 index 的算法。
// 圖片讀取
const manager = new THREE.LoadingManager()
this.DATA.images.forEach((url, idx) => {
    const imgLoader = new THREE.TextureLoader(manager)
    this.slideTextures[idx] = imgLoader.load(url)
})
manager.onLoad = () => {
    console.log('all images loaded', this.slideTextures)

    // 自動播放
    if(this.DATA.autoplay) {
        setInterval(() => {
            this.next(this.currentIdx + 1 > this.totalImgslength - 1 ? 0 : this.currentIdx + 1)
        }, 2000)
    }

    // listeners
    window.addEventListener('resize', this.resize.bind(this))
}
createPlane()
生成後確保讀片拿到後就要建立板子。這裡的材質設計,是依賴 codrop 教學寫過來的,所以目前就暫不多解釋 uniforms 原理。主要就是把參數帶進去 shader,讓這些數值可被控制,你也可以使用外部參數即時改變這些內容,讓特效有些特別的差異變化。
this.material = new THREE.ShaderMaterial({
    extensions: {
        derivatives: '#extension GL_OES_standard_derivatives : enable'
    },
    side: THREE.DoubleSide,
    uniforms: {
        time: { type: 'f', value: 0 },
        progress: { type: 'f', value: 0 },
        border: { type: 'f', value: 0 },
        intensity: { type: 'f', value: 1 },
        scaleX: { type: 'f', value: 40 },
        scaleY: { type: 'f', value: 40 },
        transition: { type: 'f', value: 40 },
        swipe: { type: 'f', value: 0 },
        width: { type: 'f', value: 0 },
        radius: { type: 'f', value: 0 },
        texture1: { type: 'f', value: this.slideTextures[0] },
        texture2: { type: 'f', value: this.slideTextures[1] },
        displacement: {
            type: 'f',
            value: new THREE.TextureLoader().load(dispUrl)
        },
        resolution: { type: 'v4', value: new THREE.Vector4() }
    },
    vertexShader: vertex,
    fragmentShader: fragment
})
const geometry = new THREE.PlaneGeometry(1, 1, 2, 2)
this.plane = new THREE.Mesh(geometry, this.material)
this.scene.add(this.plane)
resize()
圖片與網頁高度關係的設定,resize() 在初始 init() 的時候就要使用一次,接著往後也要綁上 window resize 的 event,在每次變化高度時,就要調整鏡頭、材質、圖片三樣東西。
this.width = this.DATA.container.offsetWidth
this.height = this.DATA.container.offsetHeight
this.renderer.setSize(this.width, this.height)
this.camera.aspect = this.width / this.height

// 這裡的寬高不是隨便都拿得到的喔
let imageAspect = this.slideTextures[0].image.height / this.slideTextures[0].image.width
let a1, a2

if (this.height / this.width > imageAspect) {
    a1 = (this.width / this.height) * imageAspect
    a2 = 1
} else {
    a1 = 1
    a2 = this.height / this.width / imageAspect
}

this.material.uniforms.resolution.value.x = this.width
this.material.uniforms.resolution.value.y = this.height
this.material.uniforms.resolution.value.z = a1
this.material.uniforms.resolution.value.w = a2

this.camera.fov = 2 * (180 / Math.PI) * Math.atan(1 / (2 * this.camera.position.z))

this.plane.scale.x = this.camera.aspect
this.plane.scale.y = 1

this.camera.updateProjectionMatrix()
next(idx) & changeSlide(idx)
剛剛有說過這裡是為了日後客製化方便拆出來寫,next(idx) 的部分主要拿來判斷,在外部進來的 idx 不等於特效目前的 idx 才可以執行。
if (idx !== this.currentIdx) {
    this.currentIdx = idx
    this.changeSlide(this.currentIdx)
}
而 changeSlide(idx) 就是開始執行換圖時,用 gsap 跑動畫時間,要丟到 requestAnimationFrame 自己寫動畫也是可以,只是這次因為要用某些客製化的緣故選擇用 gsap 當作範例。
const gsapTimeline = gsap.timeline()
const nextTexture = this.slideTextures[idx]
this.material.uniforms.texture2.value = nextTexture
gsapTimeline.to(
    this.material.uniforms.progress,  1, // duration
    {
        value: 1,
        ease: 'power2.out',
        onComplete: () => {
            this.material.uniforms.texture1.value = nextTexture
            this.material.uniforms.progress.value = 0
        }
    }
)
接著套一下 render()
requestAnimationFrame(this.render.bind(this))
this.renderer.render(this.scene, this.camera)
最後就把以上我們寫好的東西裝進去 init() 囉~ 是不是非常容易呢?
const manager = new THREE.LoadingManager()
this.DATA.images.forEach((url, idx) => {
    const imgLoader = new THREE.TextureLoader(manager)
    this.slideTextures[idx] = imgLoader.load(url)
})
manager.onLoad = () => {
    console.log('all images loaded', this.slideTextures)

    // 裝起來~裝起來~
    this.createPlane()
    this.resize()
    this.render()

    if(this.DATA.autoplay) {
        setInterval(() => {
            this.next(this.currentIdx + 1 > this.totalImgslength - 1 ? 0 : this.currentIdx + 1)
        }, 2000)
    }

    // listeners
    window.addEventListener('resize', this.resize.bind(this))
}
應用到 Swiper
以上是我大致上的把程式碼分裝邏輯講解一下,沒有細部講到 Threejs 使用的方式與原理,是因為感覺光講那些,這篇就要寫到天荒地老了。最後我們就可以把功能套到 Swiper 上囉。Swiper 也是大家用到爛掉的套件,不用再教學了吧?
new 一個特效出來
一般來說這裡如果是使用 Vue,則直接把 data 的圖片陣列帶進去就好,但要記得資料處理時,給 Swiper 的陣列順序要跟圖片一樣喔。
const carousel = new transformCarousel({
    container: document.getElementById('contianer'),
    images: [
        'http://imgurl.jpg',
        'http://imgurl.jpg',
        'http://imgurl.jpg',
        'http://imgurl.jpg',
        'http://imgurl.jpg',
    ]
})
接著啟動 Swiper,這邊我們使用了一個比較少見的 Swiper event,當有 Slide 變化時,我就呼叫我剛剛所寫的 next(idx) 功能,然後帶入 Swiper 的 index。
var swiper = new Swiper(".swiper", {
    autoplay: true,
    on: {
        slideChange: (event) => {
            carousel.next(event.realIndex)
        }
    }
});
未來要將這個特效應用到 jQuery slick、Owl、bootstrap,甚至客製化輪播,都可以使用同樣的方式,如果套件沒有提供 Event 可以監聽,那你也可以自己想辦法監聽。最精髓應該就是使用別的 index 來驅動動畫特效。就不用自己算 index 啦~
以下附上完整程式碼的 Codepen,有需要請盡情享用~ https://codepen.io/esdesignstudio/pen/mdGREML?editors=0010